Call reporting for users of CUBE
The CUBE (Cisco Unified Border Element) usually sits at the edge of your organization, being the first device that calls hit when they come in, and the last device they touch on the way out. Because of this, it is helpful to get an idea of calls that are presented to CUBE, and any errors that occur with them. This is where VoIP Detective CUBE Analytics steps in.
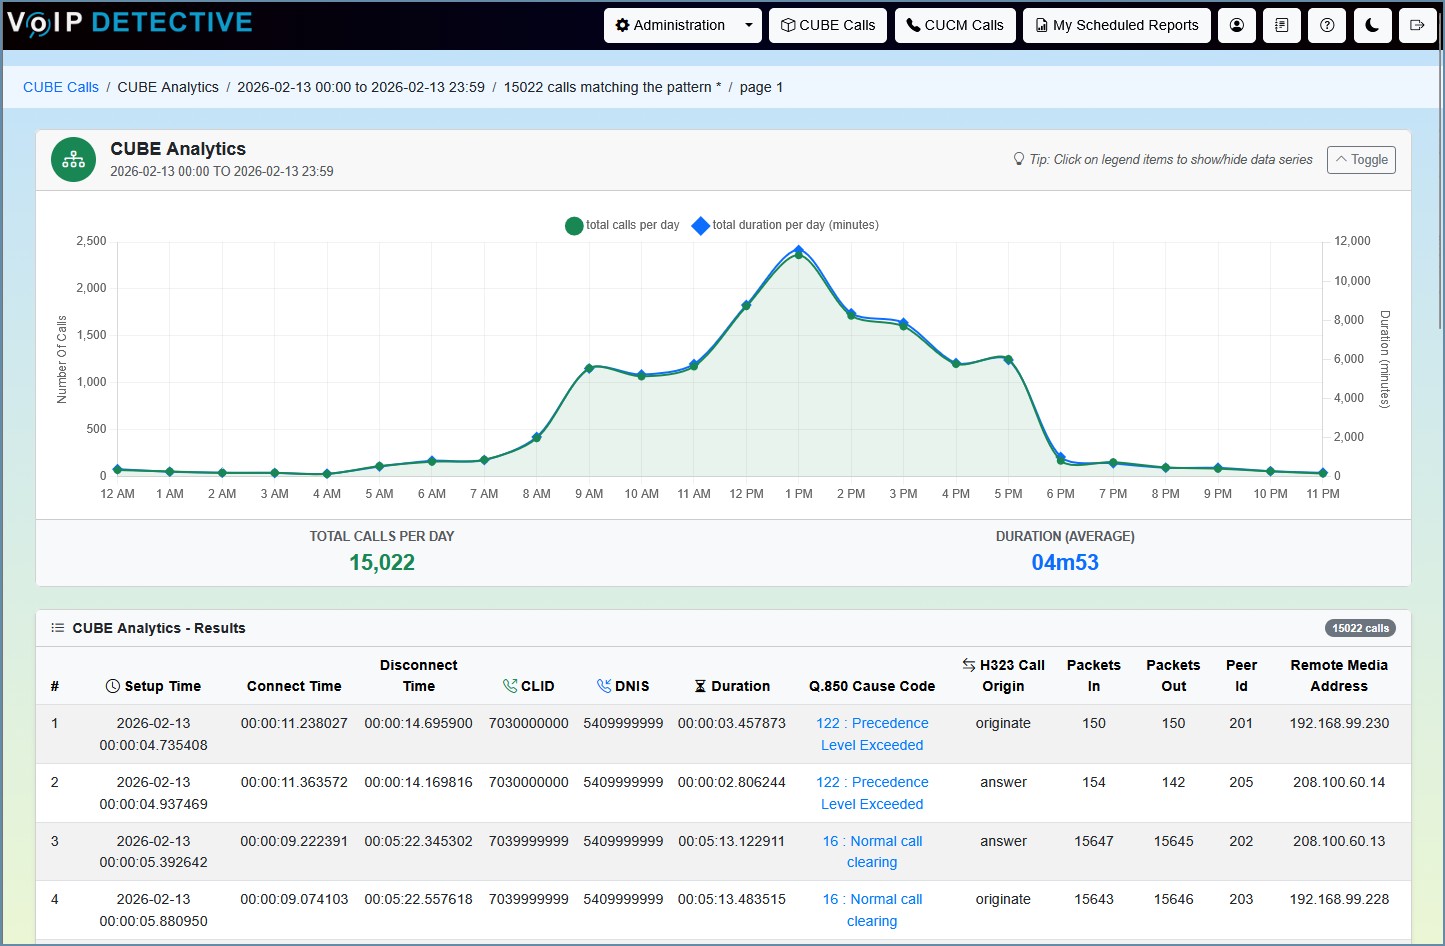
Our Admin Dashboard gives quick insights into the health and number of calls:

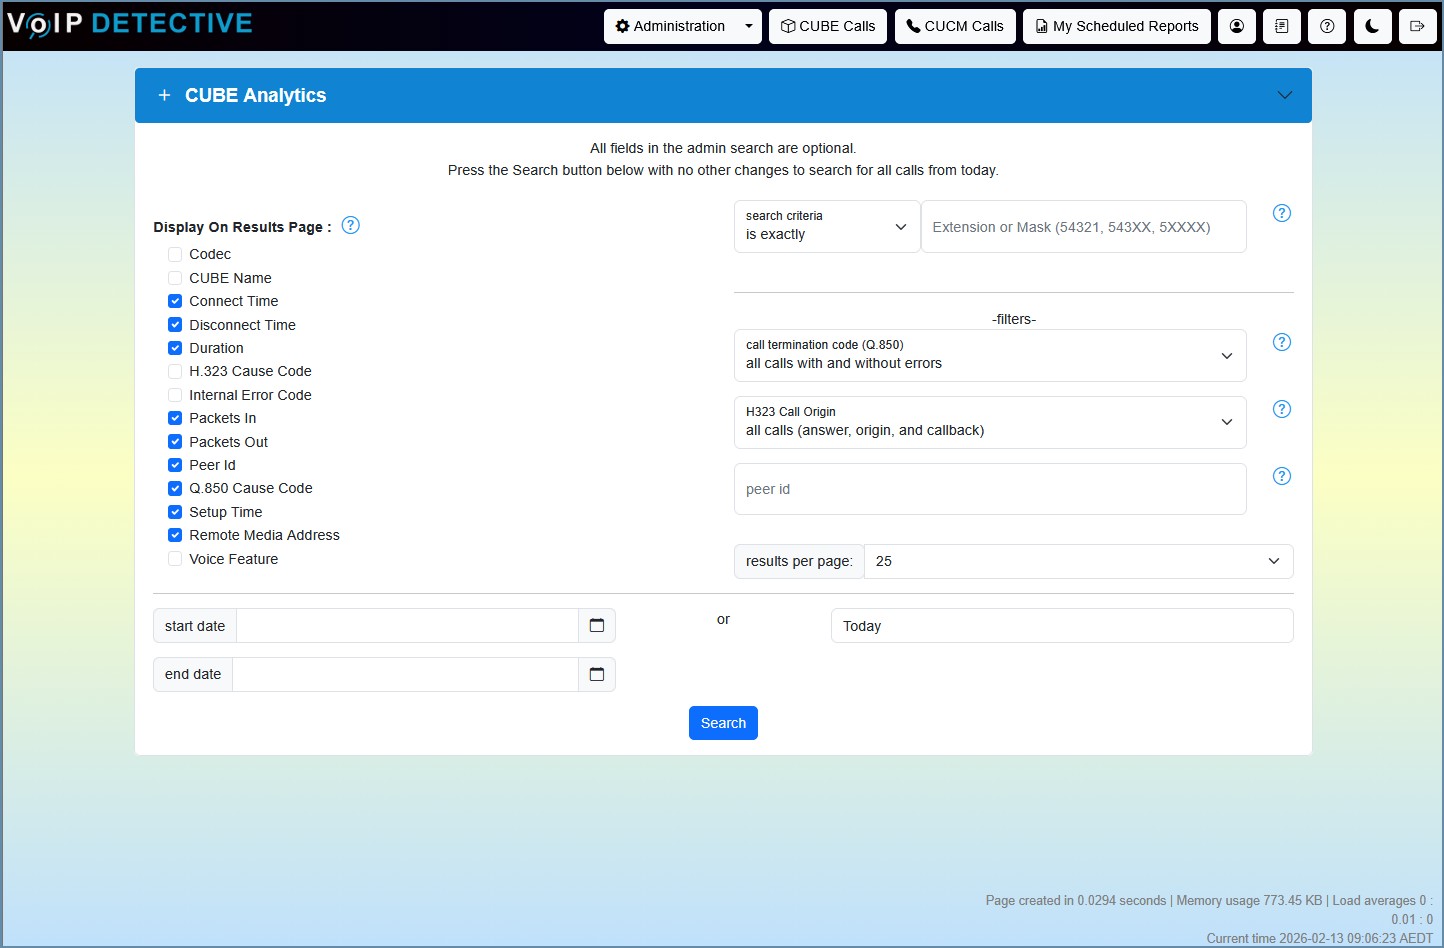
Searching CUBE Analytics is easy:
CUBE is capable of creating it's own CDRs (Call Detail Records), and sending them to a third party billing server. VoIP Detective can process these CUBE CDRs, and provide them to administrators.
What is the difference between CUCM and CUBE CDRs, in VoIP Detective?
- CUCM CDRs are processed and available in a number of reports (admin, inbound, outbound, all calls, etc). These reports include extensions, hunt groups, gateways, and more, and will show if a call has been forwarded, transferred, etc.
- CUBE CDRs are only available in the "CUBE Analytics" report in VoIP Detective. This means that any CUBE CDRs that are received will not be included in any other report than the "CUBE Analytics" report. It is also important to note that the details presented in the CUBE Analytics will only include events that happen on the CUBE itself. Once a call leaves the CUBE, no further information is available.
With these limitations to CUBE CDRs, how can they help us?
It is true that there are quite a few limitations to the CUBE CDRs - you will not be able to see any processing that CUCM does to these calls. The records will show calls coming into and leaving the CUBE, and not much more. Even with this limited amount of information, we can get quite a bit of data like:
- Understanding calls that never touch CUCM. These calls could be rejected, or could go to other destinations like MS Teams.
- "Disconnect Cause" error messages, if a call fails to connect
- Listing of calls that are rejected by CUBE, and never make it to CUCM. These can point to attacks, or misconfigurations.
- Calling Line Identification (CLID) and Dialed Number Identification Service (DNIS) before any translations patterns are applied by CUCM.
- Codec used
Requirements
- Cisco IOS Release 12.4(20)T or a later release
- Cisco IOS XE Release 16.3.1 or a later release
- VoIP Detective PRO app version 1.7 or higher
Configuration
VoIP Detective Configuration
1. Most versions of CUBE are only able to transmit files via FTP over port 21, so we'll need to enable FTP on VoIP Detective. To do this, log into the command line using the cliadmin user. Go to "enable or disable services" and choose the option to enable FTP.

2. Next, go to Administration -> Configuration and enable CUBE Analytics
CUBE Configuration
Summary of VoIP Detective recommendations:
- enable
- configure terminal
- gw-accounting file
- primary ftp <VoIP Detective IP Address>/incoming/CUBE. username voipdetective password voip (the same account and password that CUCM uses to send files)
- maximum retry-count 5
- maximum fileclose-timer 60
maximum cdrflush-timer 1
cdr-format detailed
acct-template callhistory-detail
end
write
Detailed steps with explanation
More information : https://www.cisco.com/c/en/us/td/docs/ios/voice/cdr/developer/manual/cdrdev/cdrcsv.html
Example CUBE configuration:

Troubleshooting:
If CUBE is not able to communicate with VoIP Detective (for example, a network outage), and the "maximum retry-count" is exceeded, CUBE will stop trying to deliver files. You can always see the last time a file was transmitted to VoIP Detective by going to the Administration -> System Status page:

If you notice that no files are being delivered to VoIP Detective, log into the cube and issue a "show flash: command. You may notice that CDRs are being stored in flash instead of transmitted.
show flash

Resetting communication.
If CUBE has stopped transmitting to VoIP Detective we will need to restart the transmission process on the CUBE.
We will start by closing the current file
file-acct flush with-close

Next, we will begin the push again:
file-acct reset

At this point, you should see files being transmitted to VoIP Detective. Below is a SFTP session (FileZilla) with VoIP Detective

Manually moving files from CUBE to VoIP Detective
Once we have reset communication, we can move the files that were created in our CUBE's flash to VoIP Detective.
Log into CUBE via SSH, and issue a show flash command
show flash

We will now move the file cdr.2811VoiceRouter.12_27_2022_13_48_15.661 from CUBE into VoIP Detective. The router command is:
copy flash://FILENAME ftp://VOIPDETECTIVESSHUSERNAME:VOIPDETECTIVESSHPASSWORD@VOIPDETECTIVEIP/incoming/CUBE.FILENAME
Important : The CDR filename must start with "CUBE" when it is sent to VoIP Detective. To achieve this, we alter the prefix during the copy process. CUBE generally prefixes with "cdr', so we will remove the "cdr" and replace it with "CUBE" (case sensitive). The format will be CUBE.routername.date
In this case the final command would be
copy flash://cdr.2811VoiceRouter.12_27_2022_13_48_15.661 ftp://voipdetective:voip@192.168.1.2/incoming/CUBE.2811VoiceRouter.12_27_2022_13_48_15.661

Now that we have successfully copied this file we can delete it from our CUBE's flash
delete flash:FILENAME

Repeat this process for any other files that were stored on the router
CUBE still not sending CDRs
If you've tried the above, and your CUBE router is still not sending CDRs, you can try the following in order see what the CUBE experiences
debug voice fileacct
debug ip ftp
conf t
logging buffered debugging
exit
term mon
Example output
Was this article helpful?
That’s Great!
Thank you for your feedback
Sorry! We couldn't be helpful
Thank you for your feedback
Feedback sent
We appreciate your effort and will try to fix the article